It was easy to sign up for a Quilting 101 class. It was easy (if expensive) to acquire the tools you needed to complete the class. But as I stood in front of the shop's wall of fabrics I realized: choosing colours and patterns for my class sampler quilt...Was Not Easy.
I had arrived at age 50 with absolutely no training in the basics of colour and design. A bit of a handicap for a quilt noob! The fabric wall defeated me; I appealed to the shop owner for help in choosing a set of fabrics for my class quilt. We managed, but I have learned since that it is almost impossible, and not likely advisable, to choose all the fabrics for a project in one shop. You are all too likely to end up, like I did, "doing just okay". Your quilt will be fine, but chances are, you could have done a lot better.
Fabrics chosen for me, I launched into the class and worked hard on things like 1/4" seams (accurate 1/4" seams), half square triangles, cutting fabric properly, and all the myriad sewing skills that quilters must master. By the end of the course, I was a much better seamstress. But I was still floundering in the colour and design category.
An online shop helped me choose my fabrics for my Quilt 201 class. With a wider range of options, and by now using quilt software to preview fabric choice and placement in blocks, my second quilt turned out much better.
But I still couldn't have chosen fabrics on my own.
I realized I had to get some training in basic colour theory, and bought some books to help me along. They worked well, but it was not until I wandered into a small shop in Pacific Grove, CA whilst on holiday that I really began my colour education. On the wall was an incredible quilt, Red Sticks:

I had never seen a quilt like this! Below it were the Collaborative Quilting books by Gwen Marston and Freddy Moran. I bought them both. I carefully read and re-read them over the next few weeks, soaking up the luminous, saturated colours, the abstract designs, and the joie de vivre! I signed up for a Freddy/Gwennie course at Empty Spools Seminars and began collecting the brights and black and whites needed for these quilts, and creating my own Parts Department.
Suddenly, I was in colour country. And with no defined pattern to work from, I learned to really look at the fabrics I was working with. The education of my eye had begun in earnest, and over the course of a year I gained a degree of colour and design confidence I honestly thought was beyond my grasp.
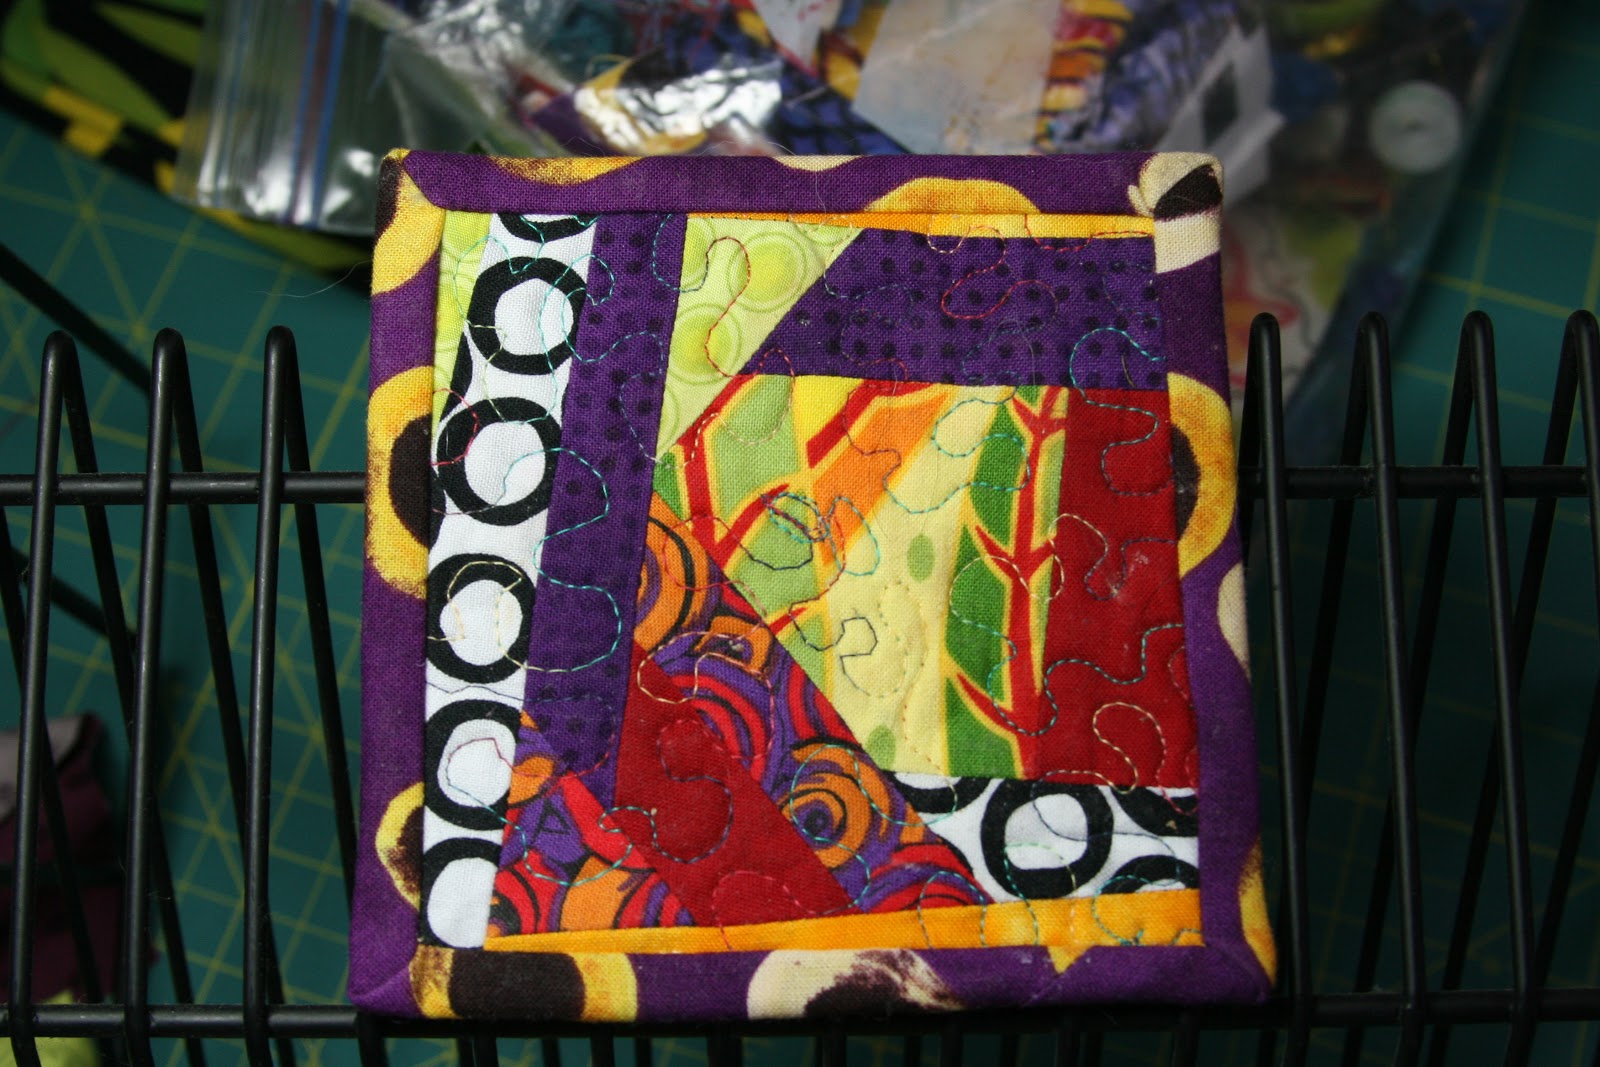
One of the things Freddy encouraged me to do was to make small colour studies, just randomly piecing together combinations from my stash that I found pleasing. I began by just pulling out my most recent favourite fabric, and finding in my (by now enormous) stash a perfect companion. I borrowed from my books on colour theory and tried classic colour harmonies...they worked! And relied on my ever increasingly competent sense of what felt right. Once my free form pieced work got large enough, I would take my 4" square ruler and cut out a pleasing 4" square section, and make that into a coaster. Choosing the backing and binding were colour study exercises on their own.
Many of these colour studies became quilt blocks and quilts. All became coasters, on which I often practice free form hand stitched quilting in crochet cottons. These colour saturated coasters give me a real lift, and make fun little prezzies.

I encourage you to take some time for fabric play, and make some colour studies. My recipe follows:
Colour Study Coasters
Choose a fabric you adore.

Find a fabric (from your stash?) that looks fabulous with that first fabric.

Find a third fabric, either a black and white print or a third colour that also looks great.

 |
| Just felt it needed a pop of hot colour! And I chose a more vibrant yellow-green. |
Take the lightest and brightest of the the three.
Cut from that fabric a small free form, roughly 2.5" in diameter.
(five sided forms work well)

Gradually add on in a wonky log cabin kind of way, mixing the colour order as you go in a way that looks dramatic but balanced and pleasing to your eye.

Cut across the piece on an angle from time to time, keeping in mind your aim:
to ignite and energize the composition.

When your composition is about 6" in diameter, lay a 4" ruler on top and rotate till you find a composition under the ruler you really, really like.

Cut out that 4" square shape.

Layer with backing and binding that add to the design. Aim for drama!
Quilt as desired.
(I like hand stitching with colourful crochet cottons)
Variations
~work in only three colours
~work in only black and white
~work in one colour plus white
~work in one colour, solid white and solid black
~work in different hues of a single colour
~work in four colours
~work from a colour harmony scheme
 |
| Cut and resewn butterfly blocks. |
Post your creations here!